Sunday, August 18, 2013

Kampar Claypot Chicken Rice (金宝瓦煲鸡饭) - (MFF - Perak)

Fluffy rice, cuts of flavorful marinated chicken meat, slices of waxed sausages, a generous thick slice of salted fish for that extra oomph! And then served with liberate amount of dark soy sauce mixture condiment and sprinkle some spring onions over. Fwoooh!!!


A good claypot chicken rice must have fluffy grains of rice, cooked in claypot under raving hot charcoal fired pits, so as to produce an aroma and rice crusts that gas stove can't produce. For those who stayed in Kampar, you guys should know charcoal fire claypot chicken rice is one of the signature dish in Kampar.


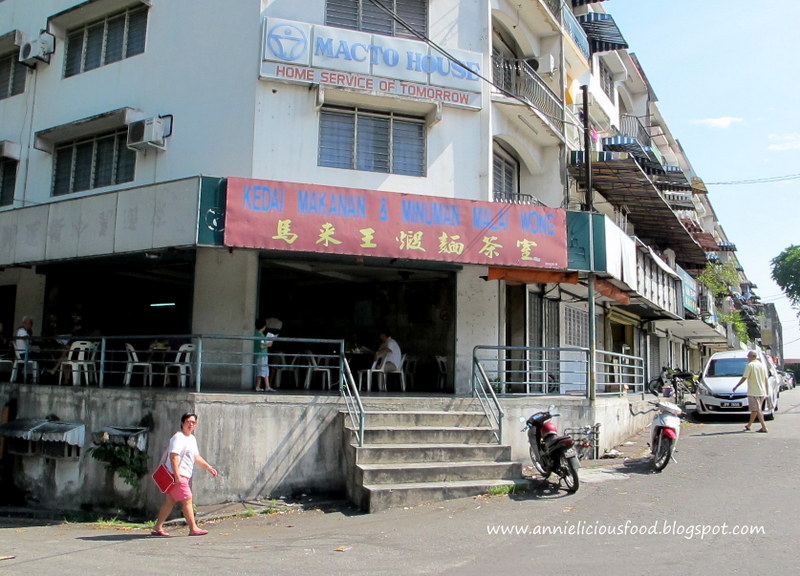
Claypot chicken rice is my 3rd featured dish for Perak's Malaysian Food Fest, focusing on Wing Lok Yuen coffee shop's delicacies located in the heart of Kampar. And yes! That's the legendary and the original Heng Kee claypot chicken rice (庆记瓦煲鸡饭) that I'm talking about.


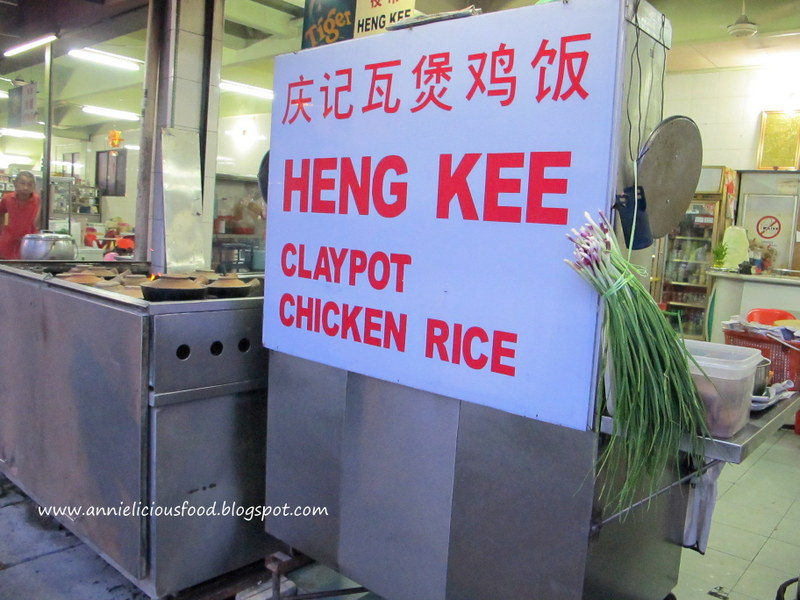
With the 50 years of history, this is the 3rd generation of the original Heng Kee Claypot Rice in Wing Lok Yuen coffee shop in Kampar. I make a trip back to Kampar last month and I purposely pay a visit to this coffee shop. Look at those claypots, look at those charcoal fire, and look at the 3rd generation boss at work. I intentionally took some photos to post it here.


I've ordered a pot of rice to share with my mom, hoping to find back the old memory. Unlike before, the rice grain that they used is rather ordinary long grain. I seen lots of broken rice grain in there. It's at the lumpy and sticky side. I think, they probably not even jasmine rice or thai hom-mali type of fragrant rice. But well, it's not surprising. Doing business nowadays, cutting cost for raw materials is one of their priority I guess.


The verdict of this pot of this original claypot chicken rice? Just like the olden times, Heng Kee's claypot chicken rice still gives the layer of crusted burnt rice at the bottom of the pot. But I'd wished if they could use better rice grain just like last time. The sauces may be a little underwhelming than before. Hence, the rice is not as flavorful and fragrant as before already. And after this experience, I tell myself, I wanted to find back the childhood taste of Heng Kee style claypot chicken rice!

Seriously, when I decided to cook this, I'm actually very stressed up! I'm so so so worried that I won't get it right.

For the sake of finding the right taste, feel and texture, I've gone through 3 attempts. The 1st time, the taste is right, but rice is too wet and lumpy. No feel. I complaint to my mom then. So, after I gather my mom's input, I challenge for the 2nd time. I finally got the taste and the feel right. I managed to get the lup-lup-fan-heong (粒粒饭香) fluffy rice! But still, I think the gees of it is not yet there. I want to make sure the whole texture is right too. So, I cooked the 3rd time, and I finally get it! The childhood time Heng Kee style claypot chicken rice!

So, here's the fine-tuned and final recipe...

Ingredient (Serves 2 to 3)
(Source : My Mother Mdm. Chai's input + Scrumptious rice and porridge cookbook as a reference and comparison)

the rice
  • 140g Jasmine Rice / Fragrant Rice
  • 70g Basmati Rice 
  • 260g Water
  • 1 tbsp Pork Oil / Lard
the meat
  • 1 Chicken Leg, about 200g (Refer to below for chicken marinade)
  • 1 Chinese Waxed Sausage
  • 1 generous thick slice of mui-heong salted fish 梅香咸鱼
the chicken marinade
  • 30g finely chopped ginger
  • ½ tsp Salt
  • ½ tsp Sugar
  • 1 tsp Oyster Sauce
  • ½ tsp Dark Soy Sauce
  • ½ tbsp Shao-Xing Wine 
  • 1 tsp Tapioca Starch
  • 1 tsp Sesame Oil
  • a dash of pepper
the seasoning and garnishing
  • 2 tbsp Pork Oil / Lard
  • 1 tbsp White Rice Wine (or Shao-Xing Wine)
  • 1 tbsp Soy Sauce
  • 1 tbsp Dark Soy Sauce (depends on how dark you want your rice to be)
  • ½ tsp Chicken Powder or a pinch of MSG (optional)
  • 1 tsp fried shallots (optional)
  • some chopped spring onions (garnishing)
Note
  1. The claypot size that I'm using is 8.5 inch for external measurement, and about 6.5 inch for internal measurement. 
  2. Chicken meat gives moisture to the rice. If you add more chicken meat, the cooking time would be different, and the wetness of your rice would be different too.
  3. You can substitute pork oil / lard with fried shallot oil. However, without pork oil / lard, you won't be able to achieve the right taste. Pork oil / lard is one of the important ingredient for this claypot rice.
  4. Go ahead and opt out the chicken powder or MSG. But I'm very sure that commercial ones have either chicken powder or MSG in it. That's why I stated on my recipe. 
  5. Prepare pork oil / lard in advance. I always did that, and keep them in air-tight container, and kept in the fridge. It comes in handy when I need it. It stored well in the fridge for up to a month or more. 
Preparation
  1. Wash rice, soak in water for 30mins. Drain thoroughly. Mix well with pork oil / lard. Set aside for another 30mins.
  2. Meanwhile, clean and cut chicken into pieces. Marinade chicken for 30mins. 
  3. Soak chinese waxed sausage in hot boiling water for 10 mins. Slice, and set aside.
Method
  1. In a claypot, add in rice and 260g of water. Lid on, and cook over medium high heat until water almost dried up, but still wet and small holes starts appearing. This takes about 6 to 7mins.
  2. Open lid, arrange chicken pieces, salted fish and sausages on top of the rice. Cover the lid. Lower the flame to low heat. Place a piece of tin cover on top of the flame. Put the claypot on top and let it cook for another 13mins or so. Or if you want thicker layer of crust, you may want to consider to leave it there for another minute. 
  3. To serve, remove claypot from heat, pour over seasoning and garnish with spring onions. Mix thoroughly and serve IMMEDIATELY. 
Cut chicken legs into chunks, marinade well. Prepare everything before you start cooking.


This is the trick that my mom taught me. Go hunt for a piece of tin cover (Milo tin or Milk powder tin or whatever tin cover you can find). Place it on top of the flame. Put the claypot on top of the tin cover and let it cook for another 13mins. This will guarantee nice rice crust at the bottom without over-burning them. This trick is workable on the stove-top too. 


My 1st attempt. Used only jasmine rice. It taste good, but rice too soft and at the wet side. It doesn't achieve the fluffiness that I used to eat during the old times. Nope! Not right! Max complained that this shouldn't be the way. And hell, I know. Sigh!


Claypot rice is cooked! This is photo is my 2nd attempt. My mother is very true about the mixing of jasmine rice and basmati rice. Without mixing in the basmati, it won't able achieve this.


Yumms! Fluffy and fragrant claypot rice! This is the lup-lup-fan-heong 粒粒饭香 feel that we used to had during our childhood times. The good old times feel is back!


Take a closer look...


If you are a claypot chicken rice lovers, I'm sure you would attest to the fact that the layer of rice crust at the bottom is absolutely heavenly treasure to you. The truth is that, in order to achieve that layer of crust, certain level of technique is needed. Rice must not be too wet (but must not under cooked), fire must be nicely controlled to avoid overly-burnt aroma that mars the whole experience.


For my rice crust, I'm glad that I did it pretty well, although it is not perfect, not as good as Heng Kee's one maybe. But oh well, I'm pretty satisfied for this 2nd attempt result. I didn't take photo for the 3rd attempt. At least, from foodie to amateur cook like me, this very close to what I'm looking for. I'm happy enough :)

Unlike amateurish version of claypot chicken rice out there, some with sticky and lumpy overcooked rice, or some under-cooked grains (which I will curse when I ate them), this method of cooking claypot rice is really worth a try as the texture of the rice is just perfect. You don't need chopped bird's eye chillies or extra dash of soy sauce. The fluffy and flavorful rice was a joy to be relished on its own. And when complemented with the meats, needless to say, the excitement was heightened by a few notches!


Do give this a try. I'm sure you will love it :)


I am submitting this post to Malaysian Food Fest Perak month hosted by WendyinKK of Table for Two….or more.

Wednesday, August 14, 2013

Kampar Prawn Noodles wannabe (金宝 "马来王" 虾麺) - (MFF - Perak)

My 2nd replication dish for Perak's Malaysian Food Fest . Ma Lai Wong prawn noodles (金宝 "马来王" 虾麺), the original prawn noodles and braised pork ribs in Wing Lok Yuen coffee shop in Kampar during the olden days. And as I mentioned before, Ma Lai Wong's prawn noodles and braised pork ribs is one of the "must-try" food in Kampar back then. 


The taste of the olden days prawn noodles is still in my memory. Ma Lai Wong prawn noodles has been around in Kampar for many years, handed down from father to son and it is once a popular haunt for the locals back then in the late 70's and early 80's. The prawn noodles stall was first located in Wing Lok Yuen coffee shop (永乐园茶餐室), in Kampar, Perak. But now, they have moved, and now  located right smack along the Kampar town main road towards UTAR, the shop at one corner right after ACS school, opposite ESSO Station.

I visited Ma Lai Wong coffee shop a month ago. As I mentioned in my previous post about Kampar Braised Pork Ribs Platter (金宝 "马来王" 卤排骨), and I kinda feelin' sad about the visit.


The cook has changed, and the taste has changed, the look has changed, the chilli has changed. And of course, price has changed too. This is for sure. The only thing remain is the name "Ma Lai Wong" printed on the signboard. 

They serves 2 types of noodles. 1st type is Pork Ribs Noodles, which they actually pour over braised pork ribs and it's sauce onto the cooked noodles. The 2nd type is the Prawn Noodles with the choices of thick yellow noodles, normal type of yellow noodles, or even rice vermicelli (beehoon) too. I ordered a bowl of prawn noodles, intentionally asking for thick noodles. Request to add some small intestines to go along. 1st sip on the soup, I stare at my mom, and I said "Mom, this is sugar-overloaded soup. Not like before". She ask me to take a look at the owner and the entire coffee shop's environment. The owner's style is quite laid back I'd say. The typical retired man just wanting to keep the family business going type. I don't see any cooking nor foodie passion in him. 


When I was 5, my mom used to sell prawn noodles in Kampar too. The taste of my mom's noodles and ribs is pretty close to Ma Lai Wong's one. My mom said, they used to call it "Kampar style" during the old days. The only difference is that Ma Lai Wong's name is somehow more famous and has become a kind of recognition by the locals.

Okay, enough with the story. So, here's my replication of Ma Lai Wong's olden day's prawn noodles wannabe with my mother's recipe.

Ingredients (Serves 5 to 6)
(Source : My Mother - Mdm. Chai)

for the soup
  • 1 kg Fresh Prawns + some extra prawn shells and head (*see note)
  • 2 pcs Pork BIG bones (or more if you want)
  • 30g Anchovy Fish
  • 35g Rock Sugar
  • 1½ tsp Salt
  • 1½ tsp Chicken Stock or Anchovy Stock
  • 50g Fried Shallot
  • 1.5L Prawn broth
  • 1.3L Water
for the condiment
  • cooked prawn meat from the 1kg prawn
  • 1kg Vermicelli (Beehoon) or mixture of both Vermicelli and Yellow Noodles. 
  • some fish cakes
  • some pork lean meat, cooked, sliced.
  • some beansprout, about 150g should be fine
  • some kangkong  (*see note)
  • some fried shallots
for the chilli  (*see note)
  • 5 fresh Red Chilli, finely blended
  • 5 tbsp Chilli Boh (or more)
  • oil from frying prawn head
  • 50g Fried Shallots 
  • 45g Garlic, minced
  • 25g Dried Shrimps, finely chopped
  • 15g Belacan, chopped into small pieces
  • 2 tbsp Sugar
  • ½ tsp Salt
  • ½ tsp Chicken Stock

Note : 
  1. My mother do not know about Ma Lai Wong's chilli sauce. She said she suspect Ma Lai Wong's chilli sauce might be supplied chilli sauce by food supplier. But well, we are not sure. So, instead of replicating Ma Lai Wong's chilli sauce (which we totally have no idea), she gave me her own prawn noodles chilli recipe, which I really like it. So, this chilli is absolutely optional, although it is really good to have.
  2. Kampar prawn noodles doesn't serve with kangkong. Singapore prawn noodles does. I added it in because Max insisted to have them. So, kangkong is absolutely optional. 
  3. I used to accumulate prawn shells and heads. Whenever I need prawns for stir frying. I will use the prawns meat, wrap up the prawn shells and heads, keep in the freezer nicely. When I have kept enough of em', I can use them too cook up a pot of nice prawn soup. So, do add extra prawn shells and heads in the soup for better result.  
I have my full trust on my mother's recipe as I eat her prawn noodles and braised pork ribs platter almost everyday when I was a kid. 

Preparation
  1. In a wok, boil 1L water, blanch the prawns till cooked. Keep the prawn broth, drain the prawns and let the prawns to cool down. Once prawns cooled down, remove the prawn shells and prawn head. Set cooked prawn meat aside as part of the condiment.
  2. In a wok, add half cups of cooking oil. Fry prawn shells till fragrant. Fried prawn shells are for soup. Keep the oil. We need it to cook the chilli. 
  3. In a saucer, boil some water and cook the pork loin. Once cooked, let the pork cool down before cutting them into slices as part of the condiment.
Method

for the soup
  1. In a soup pot, add in pork bones, anchovies, fried prawn shells, rock sugar, prawn broth and water. Bring to a boil, and let it simmer on high heat for 3 to 5mins. 
  2. Lower down to low fire and let it simmer for 20mins.
  3. Add in fried shallots, still under low fire, continue to simmer for another 20mins. 
  4. Once done, add in salt and chicken stock to taste. The soup should taste slightly salty. 
  5. Discard all the prawn shells, anchovies and pork bones and the soup is ready.
for the chilli
  1. In a wok, add in the oil from frying prawn head, garlic, fried shallots, garlic, dried shrimps, belacan. Fry till fragrant. For about 8 to 10mins or so. 
  2. Add in sugar, salt, chicken stock, fresh chilli and chilli boh. Fry for another 2mins. Heat off. 
to serve
  1. Boil a pot of water, cook the noodles together with bean sprout. And of course, kangkong is optional. Drain. 
  2. Place cooked noodles and beansprout on a bowl. Add in cooked prawn meat, pork loin slices, fish cakes and pour in the hot prawn soup. 
  3. Garnish with fried shallots and serve immediately, preferably with Kampar Braised Pork Ribs Platter (金宝 "马来王" 卤排骨). And here... Kampar Prawn Noodles wannabe! 

The recipe for the soup is not something complicated. And I really like the taste of it. 


And everything in the pot, let them simmer away... 


After 45mins, this flavorful soup is done! Discard all the prawn shells, anchovies and pork bones.


When I look at my prawn noodles photo, I hate myself so much! Because I didn't add enough soup on the bowl and the noodles absorb the soup so so so fast! By the time I finished shooting, I gotta rush for other errand because I have friends at home waiting to eat my prawn noodles. After all my friends left, I checked on my photo, my heart sunken like a titanic. It indeed looked deceiving. My prawn noodles looked like dried prawn noodles. Where's the soup?! How disappointing.


I did wanted to cook 2nd attempt just for photography purpose. But think again, I really don't have enough time for that, and I won't be inviting guests to come over to help me finish them up. So, I dropped the idea.

This recipe is indeed a keeper. I definitely will keep it and cook it again when I have the opportunity. Thanks mom! :)


I am submitting this post to Malaysian Food Fest Perak month hosted by WendyinKK of Table for Two….or more.

Thursday, August 8, 2013

Kampar Braised Pork Ribs Platter (金宝 "马来王" 卤排骨) - (MFF - Perak)

It's the month of Perak for Malaysian Food Fest! I'm so excited!

Kamparean, I'm sure you somehow know this. If you are Kamparean between 70's and 80's generation, you definitely know Ma Lai Wong's (马来王) stall in Wing Lok Yuen. This Kampar braised pork ribs platter a simple and yet classic braised dish that always goes together with prawn noodles as a side.


Since this month's Malaysian Food Fest is Perak, I'm going to feature my replication of my hometown's dish, focusing on Kampar's Wing Lok Yuen's good-old-days specialty; prawn noodles, braised pork ribs, claypot chicken rice and hopefully I could get the CB chicken biscuits recipe right too.

Some background of this dish : Wing Lok Yuen (永乐园茶餐室) is one of the legendary coffee shop in Kampar, Perak founded since 1947 by a local Kampar based family. This coffee shop is famous with it's prawn noodles, braised pork ribs ("马来王"虾麺+卤排骨), claypot chicken rice (庆记瓦煲鸡饭) and it's traditional confectioneries - especially Chicken biscuits (CB 鸡仔饼).


(Photo Credit : Asia Explorers)

Ma Lai Wong (马来王) is the original prawn noodles and braised pork ribs stall owner in Wing Lok Yuen during the olden days. Ma Lai Wong's prawn noodles and braised pork ribs is one of the "must-try" food in Kampar back then. However, as time passes, Ma Lai Wong has moved, and setup their own prawn noodles coffee shop instead. They no longer renting a stall in Wing Lok Yuen coffee shop anymore. And now, I someone else took over the prawn noodles stall in Wing Lok Yuen.

A month ago, I make a trip back to my hometown Kampar, and I visited Wing Lok Yuen coffee shop to look at their current prawn noodles stall. My intention is to taste their noodles and ribs and see if I could still find back the childhood taste. I'd say, the existing prawn noodles stall continues the same way Ma Lai Wong sell their noodles, serving braised ribs as a side. And as expected, the good-old-days taste is no longer there. It's salty. It's disappointing. But well, time has changed. People changed too.

I took a photo of the braised pork ribs platter to show you guys how it looks like. And yes, Ma Lai Wong's serving style is the same as this. One bowl of prawn noodles and a small plate of braised pork ribs platter, with the combination of pork ribs, eggs, pressed tofu. And even pig's tail if you request for it.


To kill my curiosity, I get my mom to hunt for Ma Lai Wong coffee shop's current location a month ago. Sadly, everything has changed. The cook has changed, and the taste has changed too. The only thing remain is the name Ma Lai Wong hanging on the signboard.


My mother knows how to replicate this braised pork ribs platter. I have my full trust on her, because she do sell prawn noodles and braised pork ribs platter too when I was 5. I ate them almost everyday. The taste of my mom's noodles and ribs is pretty close to Ma Lai Wong's one. My mom said, they used to call it "Kampar style" during the back old days. The only difference is that Ma Lai Wong's name is somehow more famous and has become a kind of recognition by the locals.

(Disclaimer : Please correct me if I'm wrong, as all these info's are provided by my mom and also my aunt who stayed in Kampar long enough to tell me these old-wives-tales.)

Ingredients
(Source : My Mother - Mdm. Chai)
  • 600g Pork Prime Ribs 龙骨 (Cost est. S$15.00)
  • 2 Pig Tails 猪尾 (Cost est. S$3.30)
  • 600g Small Pork Intestine 猪小肠 (Cost est. S$8.40)
  • 3pcs Pressed Tofu / Tau Kwa 豆干
  • 4 Hard Boiled Eggs 熟鸡蛋
  • 6 tbsp Light Soy Sauce 酱清 / 生抽
  • 1 tsp Dark Soy Sauce 黑酱油 (optional) 
  • 4 tbsp Oyster Sauce 蚝油
  • 2g Dried Tamarind Peel 甘皮 (about 4 x thumb size visually)
  • 1 whole bulb of Garlic, bruised 蒜头 (about 50g)
  • 15g Rock Sugar 冰糖
  • 1 tsp Salt 盐
  • 800ml Water 水
Some additional info here. These are the market price for the ingredients at major supermart and wet market. Just incase you worried you will get chopped "carrot-caked" by the butcher.
  • Pork Prime Ribs : S$21.00 to S$23.00 per kg.
  • Pig Tails : S$1.70 to S$1.90 per kg.
  • Small Pork Intestine : S$1.30 to S$1.50 per kg.
Preparation
  1. For preparation of small pork intestine, refer to here. But of course, you can choose not to stuff the small pork intestines as it is pretty tedious. 
  2. Cook up some hard boiled eggs.
  3. Deep-fried pressed tofu / tau-kwa. Set aside.
  4. Soak up dried tamarind peel till soft. Scrape away the whitish inner line. 
Method 
  1. In a pot, add in small pork intestine, soften tamarind peel, rock sugar, garlic and water. Bring to a boil for 15mins. By then, small pork intestine is slightly soften.
  2. Add in light soy sauce, oyster sauce and prime ribs, cook for another 20mins.
  3. Add in hard boiled eggs, tau-kwa, pig tails. Then, add salt, and dark soy sauce (if you prefer darker color). Lid on and under very low fire. Let it slowly simmer for another 20mins, or more, or until the pig tails is soften enough. Give the meat few turn in-between. Leave this pot of braised goodness overnight for more flavorful result.
  4. The next day, heat up the pot of braised goodness. Dish up some ribs, and eggs. Chop tau-kwa and pig tail into pieces. Pour some braised sauce over. Serve hot. Preferably with a bowl of Kampar prawn noodles (Recipe is here). 
This is the pork prime ribs that I've got from Giant. Pretty nice cut. But well, prime ribs are always expensive. Especially I'm getting Aussie ribs.  


Pig Tails and Sweet Intestines. Looking at it alone, you know they are really fresh.


I got this Ampang Tau Kwa at Giant. Comes with a pack of 3, and I deep-fried it nicely, and then I use it for braising later.


Look at this pot of goodness. The braised sauce is actually very little and concentrate. The water is just enough to cover the braising stuffs. If more water is added, it will turn too diluted and looked like a pot of soup. However, if you prefer more braised sauce, do add more water and add more condiments accordingly. I always emphasized that cooking is all about individual preference.


This is the result. It is nice! Max loves it!


This is my 1st attempt. It's good, but I didn't adjust the taste well. I added too much rock sugar, and I kinda didn't get the right feel of it. The taste and feel that I'm looking for is the good-old-day's taste. The authentic one that I ate during my childhood time. The one when Ma Lai Wong is the cook. Not the latter version.


For the 2nd time, it's much better and the taste is very much closer to Ma Lai Wong's one.


Do give this a try. I'm sure you will love it :)


I am submitting this post to Malaysian Food Fest Perak month hosted by WendyinKK of Table for Two….or more.

Tuesday, August 6, 2013

How to prepare Small Pork Intestines (如何处理猪小肠)

Ah... I know lots of modern people don't take intestines nowadays. But intestines is a common food to me. It's like, another meat dish. Such small pork intestines can be fried, steamed, or braised. They can be served as a dish on it's own, eat with noodles, rice or even porridge.

I love intestines. I love it's sweet taste, it's bouncy texture and it's chewiness. And did you see how attractive the braised sweet intestine is? They are not ordinary small intestines. They are STUFFED!

8 Layers!!!!


And for the 1st attempt, I only did 4 layers. You can take a look at the difference.


Earlier on, I shared how to prepare pig stomach. This time, it's gonna be small pork intestines.

It may sounds tedious, but if we wants to enjoy this nice meaty small intestine, it's unavoidable. Unless you want to eat outside :)

The saddest part about this stuffed small intestine is that, it is almost impossible for you to get this type of stuffed small intestine easily. Simply because it is just too much work for people to do it for business. I knew there are some authentic Chinese restaurant does, but they are super high priced. One very small (almost pathetic) portion of braised stuffed sweet intestine could easily cost S$9.90. Oh well, but if you are not fussy, Kway Chap is everywhere around the hawker center. They do have sweet intestines, but they are not stuffed for sure.


This is the 1st time I did this. But I'm glad that I did it. When I called my mom and tell her I wanna  cook small pork intestines, I get 'piang'ed by my mom with her first sentence "Aiyahhhh... You don't know how to prepare one lahhh!!!"

You know? It's like, confidence level gena flushed down by one big pail of ice-cold water? Haiss...  But nevermind. Anyway, it's okay. It's part of my learning stage. Based on my mom's description through phone, courageously, I learn to do it myself :)

I bought some really nice small intestine and some ribs, because I planned to braise them (recipe will be out soon). For some people who don't know where does these small intestines comes from, here, this photo could gives you a clearer picture, although not in detail. The part in red. That's the small intestine (小肠) that I'm talking about. Some people called it pork intestine, some people recognize it as sweet intestine as usually major supermarts will label it as "sweet intestines".


Photo Credit : Westpol

But please do not mixed up. To my understanding, sweet intestines is the first portion of the small intestines called duodenum, also known as 粉肠, which is usually much more pricier than small intestines as it is not easy to get. Unless you are the butcher's good friend, and that should be easier :)

One of the nicest thing of eating intestines is that, we consume every part of the animal instead of wasting it. It's absolutely desirable to make good use of every part of the intestines and turn them into nice dishes. They have different structures and taste.

Cleaning Sweet Intestine method

1. First, snip away the inner layer of whitish skin-look-alike thing that originally joint together with the intestine. You don't need those. Once snipped away, your small intestine will then turned into a looooooong and straight piece.


2. Prepare bowl of salt and a bowl of corn flour (or tapioca flour). 

NOTE : For hygiene reason, DO NOT take your salt straight from your salt container with your bare hand and just rub it on the intestine, and then take the salt again! Urgh! This is really not hygiene. Please pour the salt on a bowl. If you can't finish those salt in the bowl after you cleaned the stomach, discard. Your finger touches the stomach, and then the salt, and then the stomach again... You still want to keep those salt? Hahaha...Anyway, this same applies to the corn flour / tapioca flour.

3. Apply a handful of salt on the intestine surface, give it a good rub. Leave it there for awhile and then rinse with running water. By now, you should get rid some of the slimy and greasy residue and smell. Rinse with running water. Repeat this at least twice to ensure they are well cleaned. 


4. . Once it's done,  flip the intestine inside out and wash the inner part. Refer to below photo, we just kinda stuff one side into the other side, and then you will be able to flip the inner part over. Once it's done, repeat the step 3 washing until they are well cleaned. 


5. Rinse with water until water runs clear and drain it.


They are now cleaned and drained. Looks like I have alot of them yea. Read on, and you will know that they are not alot actually.


6. Next, we will need to stuff the intestine into layers (4 layers or more if you want). Decide how many layers you want your sweet intestine to be. 4 layers? Cut them into 4 equal length. You want more? Divide accordingly. Don't forget. You need to divide them into equal length :)


7. Just use two fingers to expand one end of the intestine into a big hole, stuff in one layer. Once done, you get 2 layers of sweet intestine. With the double layered sweet intestine, take another intestine, expand the other end and stuff it in again. Like that, you will have 3 layers. Repeat the step for the 4th layers and if you want more, just repeat the steps again until you finished up the intestine. 


Because the intestine itself is smooth and slimy in texture, it will be able to slide in on it's own pretty well. Do it gently. Once you get the flow right, it's actually quite fun to do it :)

6. Once 4 layers are done, use a toothpick to poke on both ends. This is to secure the position of the stuffed intestine. And you could see from the photo.  They are expanded into bigger size.

This one... 4 layers.


This one..... 8 layers!!!


7. Boil the intestine in a boiling water for 5 minutes. The five minute boil will set it's shape and it also cooked away the slimy impurities. Once the stuffed intestine contact with hot water, it will shrink. And this explains the reason why we need to use toothpick to secure it's position. With this, it won't affect the stuffing effort that you just did.


8. Dish up the stuffed intestine and put them into tap water to let it cool down. There may be some impurities water might trapped inside the intestine. You may want to gently press the intestine to release the impurities water.

And after stuffing them, I only have that much of intestine for braising. Not alot actually.


Once stuffed intestine is completely cooled, remove the toothpicks at both end and it is ready to use/cook. With such stuffed intestine, it is usually used as braising. You could do this a week or two ahead, and stock up in your freezer! No fuss at all. 


This is my braised small intestine. Take a look at this! Look at the nice layers of intestine. Isn't it pretty? And no! it doesn't only gives you pretty look. It's yummy too! By stuffing the small intestines into multi-layers, it could gives bouncier and chewier texture. It makes you wanna eat more because they are so so so nice to chew! And the the braised sauce trapped in every layers, it gives every mouthful of intestine chew and flavor too!

I really love the delicate taste, the soft, smooth and yet bouncy texture. I simply couldn't tell you how much I love this! And I hope you are sold by now :D


For those who don't take intestines, I urge you to give it a try again. As long as you wash the intestine clean and prepare it well, you will learn to appreciate it.

For braising of small pork intestine, you may refer to this recipe :

Kampar Braised Pork Ribs Platter (金宝 "马来王" 卤排骨) - (MFF - Perak)


Happy cooking!